It's fast and easy to create a contact in ContactPigeon. You can start by directly entering contact information within the platform or use one of the mass upload options to create contacts in bulk. In this article, we take a look at how to create a single contact.
1. Navigate to the Contacts page, from the left side menu options
2. Click "Add New"

3. Click "Add contacts one at a time"

Enter contact info. On the "General" tab, fill in the key information for a contact. E-mail, first and last name are required. All other fields are optional.
Click on "Additional Fields" to see all the default contact fields.

To add a custom date field, click on the "Important Dates" tab. You can customize the date field by clicking on and directly editing the date label.
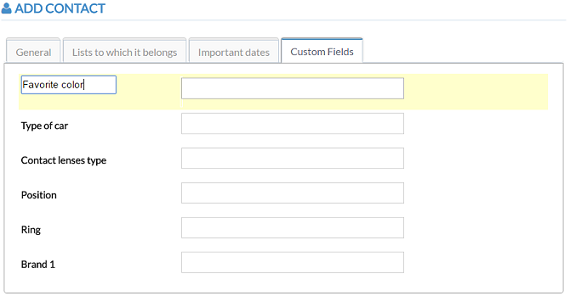
To add a custom text field, click on the "Custom Fields" tab


4. Remember to click on "Save Changes"To change a field name, click on the field label. The label will turn into text box where you can edit the name of the text.
You have 5 default Custom Fields to begin with. See Add Custom Fields to add more fields.
This saves the new contact.
